If you want to brand your LimeSurvey survey, adding your logo to your LimeSurvey template is one of the first steps. There are different approaches depending on the LimeSurvey version you are using and the template you assigned to your survey. We will show you various options and provide links for downloading professional LimeSurvey templates.
Download LimeSurvey templates
We recommend using a professional LimeSurvey template like the ones available at the LimeSurvey Template Shop for any professional survey project. All templates available for download at our LimeSurvey shop provide a logo placeholder so you can easily add your own logo. Some even come with a second logo placeholder to add a second customer or project logo. Options for uploading your own favicon are embedded as well.
Depending on the LimeSurvey version used, please follow the below instructions for adding your own logo to a LimeSurvey template:
Add logo to a LimeSurvey 3 (or later) template
LimeSurvey 3 and LimeSurvey 4 allow to easily add your own logo using the interface. If you are allowed to edit templates, you can adjust the logo globally for every survey using the given template. These options are available at:
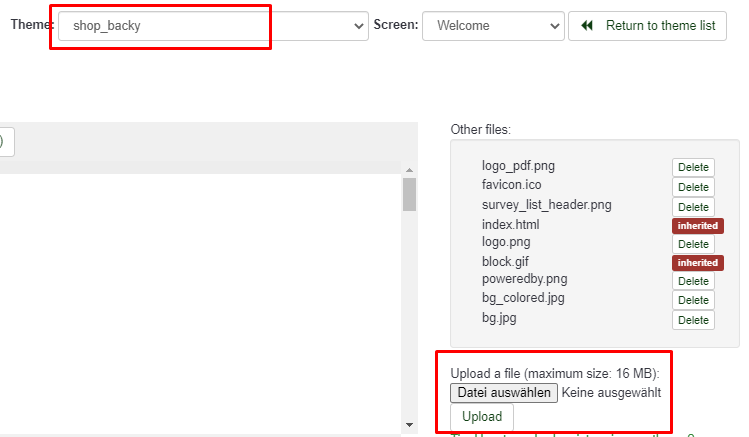
One option for uploading a logo to a certain template is using the LimeSurvey template editor:

Global theme options
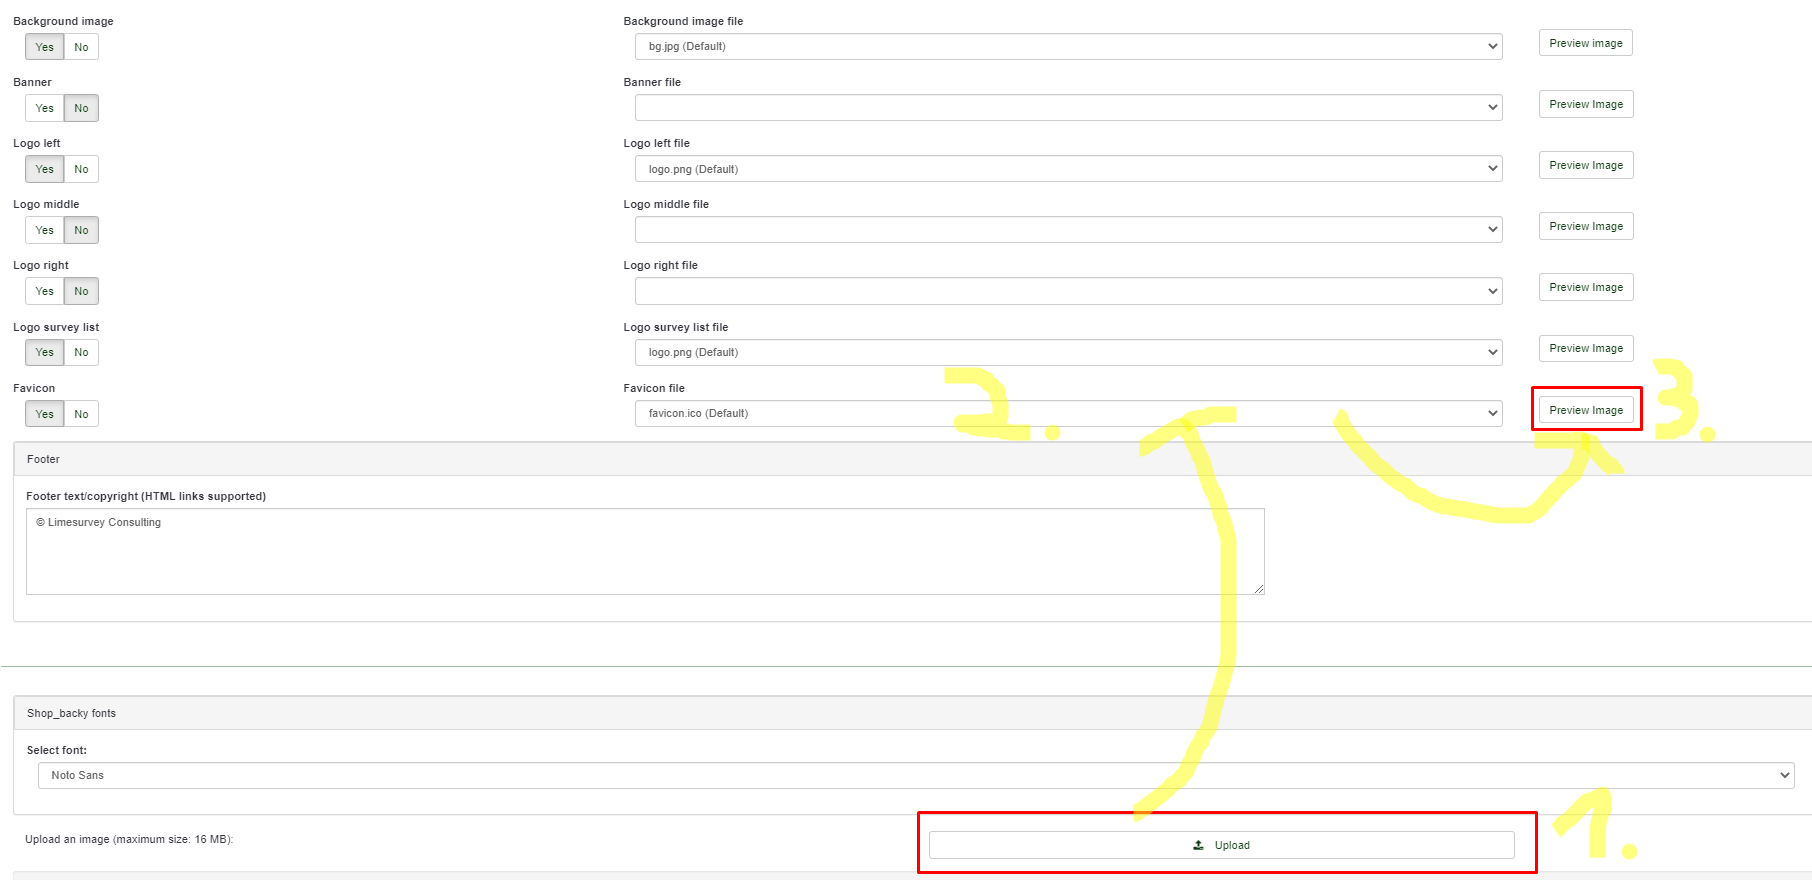
Another alternative is uploading the logo at the theme options of your template. If you want to set the logo globally, use the global theme options. At the bottom you can find a file upload option (1). After uploading the file, it shows up at the list of available files (2). You can even preview the images uploaded (3).
After having selected the newly uploaded logo, don’t forget to save the changes top right.
The below screenshot is showing the theme options avalable at our LimeSurvey template Backy. It not only support a single logo but you can also add a second project or customer logo and upload your own favicon. You can download this LimeSurvey template here.
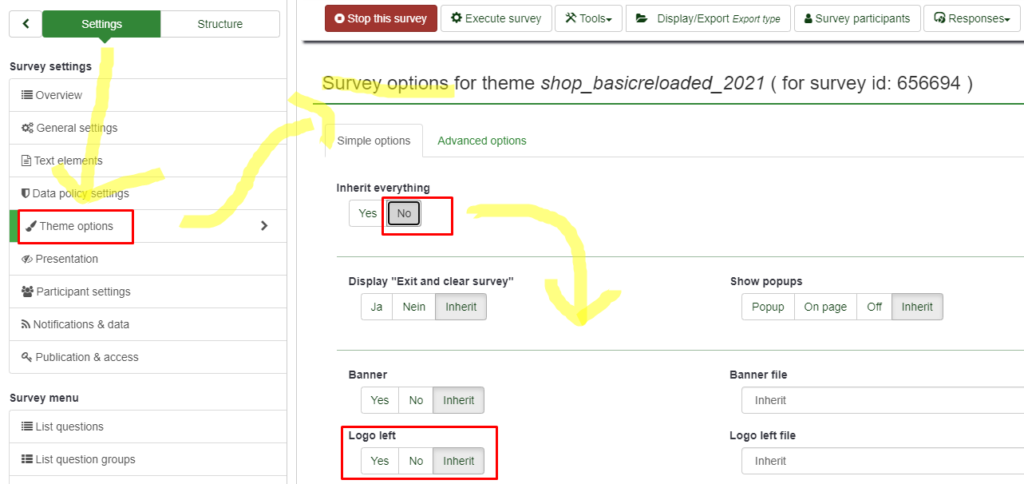
Survey theme options
Depending on your user rights, you may only be allowed to change the theme options of your survey. In this case select the theme options from the settings menu. By default the local theme options inherit all setting from the global theme options. To change the logo you first need to change this setting to not enherit everything. Afterwards, all available theme options of the currently used LimeSurvey template are listed. You can now upload and set your own logo as described above.

Add logo to LimeSurvey 2.x template
For adding your own logo to an older LimeSurvey 2.x version, you need to edit the template source code. Please follow the steps below.
Note:
Since version 2.50 LimeSurvey stores uploaded files within the files folder of your template. This means that the URL for the image file may have to be adjusted. Examples:
- Old (LimeSurvey < 2.50): <img src=”{TEMPLATEURL}yourpicture.png” />
- New (LimeSurvey v2.50): <img src=”{TEMPLATEURL}files/yourpicture.png” />
Please also note that there is no trailing slash (“/”) after the {TEMPLATEURL} placeholder.
For editing your LimeSurvey template at LimeSurvey version 2.x first go to the template editor:
Option a) – Replacing the existing “logo.png” file
The easiest way to add your own logo is to replacing the existing one named “logo.png”. This is pretty easy:
- Firstly, select the “logo.png” file at “Other files” top right at the template editor. After that, click “Delete”.
- Secondly, name your logo file “logo.png” and make sure it is not too large (recommended dimension: 200x50px).
- Thirdly, upload your own “logo.png” file by selecting it from your local disk and clicking “Upload”.
Option b) – Adding your own file with a different name
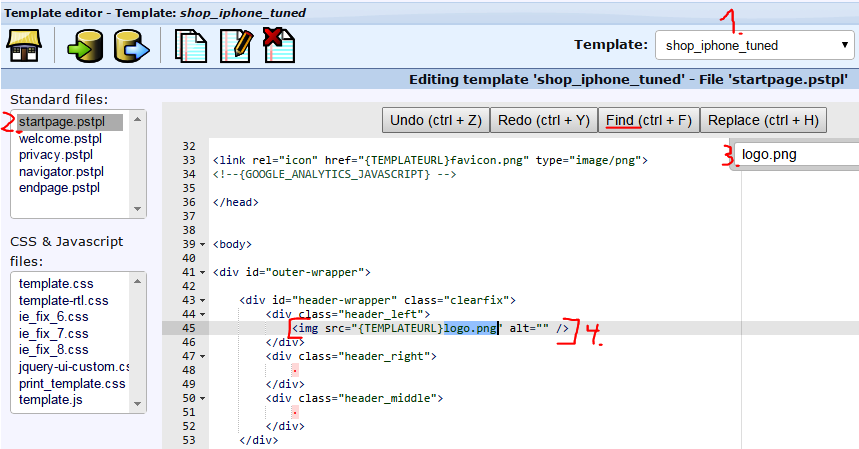
You can also add your own file with a different name and/or place the logo differently. At the LimeSurvey template editor select your template top right (1) and make sure you selct the “startpage.pstpl” page at “Standard files” on the left (2).
At the main window you can see the file content. Search the content (3) for “logo.png”.

If you just want to place your logo differently you can cut the marked line containing the HTML image tag (4.) and place it below the DIV element with “class=’header_right'” if it should be shown top right.
For centering the logo, place that line with the image tag below the DIV with “class=’header_middle'”.
When using a differently named logo file, you can upload that file using the “Select file” -> “Upload” on the right.
Afterwards you need to adjust the “logo.png” file name within “startpage.pstpl”.
Finally, don’t forget to click “Save” at the bottom of the page.


